Project Type
UI/UX Design
1 Week
Role
Researcher, Ideator,
Wireframing
The Challenge
The creation of the DJI Osmo has enabled amateur and professional photographers and videographers to utilize movement in their work in ways they could only once imagine. For videographers, the Osmo allows for highly stabilized action shots as the 3-axis brushless gimbal neutralizes camera movement due to the unsteadiness of the human hand. For photographers, the Osmo allows for a steady hand-held timelapse and hyperlapse experience. The reviews are in and they are great. DJI’s Osmo brings advanced functionality in an innovative form-factor and at an accessible price point.
A solution, such as the Osmo, begs but one question:
What’s left to improve?
As the Osmo currently operates above and beyond its competition, a redesign of its hardware, so soon after its initial launch, is illogical and could ultimately alienate its early adopters. Similarly, the DJI Go app doesn’t need a redesign as its interface is sleek and easy to use.
What the Osmo needs is additional functionality brought about by leveraging its existing hardware and accessories in a creative way.
In this design proposal, the Osmo gains the ability to create sophisticated moving timelapses with nothing more than a tripod and an additional mode in the DJI Go app.
The Design

Menu icons associated with creating a timelapse
This solution is an extension to DJI GO’s existing timelapse workflow. After the user selects the scene’s exposure, they can either start shooting immediately or utilize the new timelapse motion functionalities.
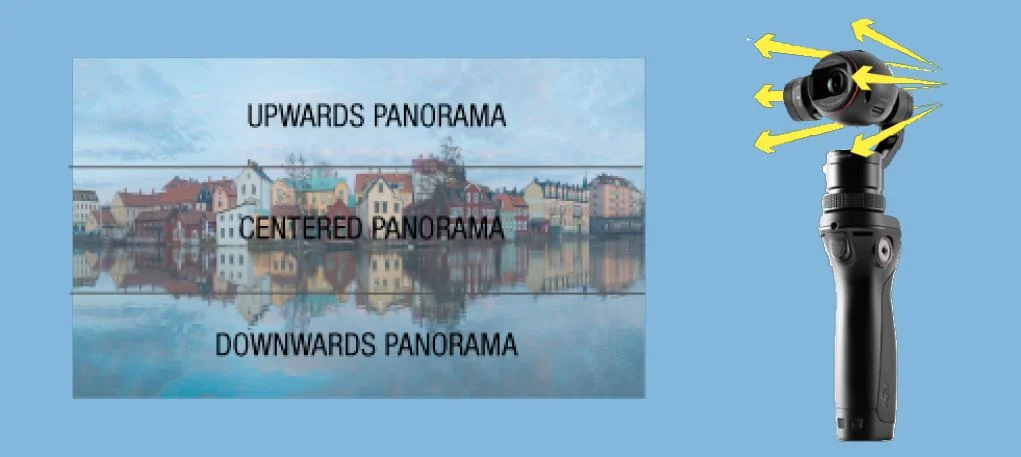
Mapping the environment through multiple panoramas
If the user selects to set motion in their timelapse, they are asked to confirm that the Osmo is mounted on a tripod. A tripod is required for this function as it allows the Osmo to accurately map its environment. Once the user confirms, the Osmo proceeds to take three separate panoramas and stitch them together.
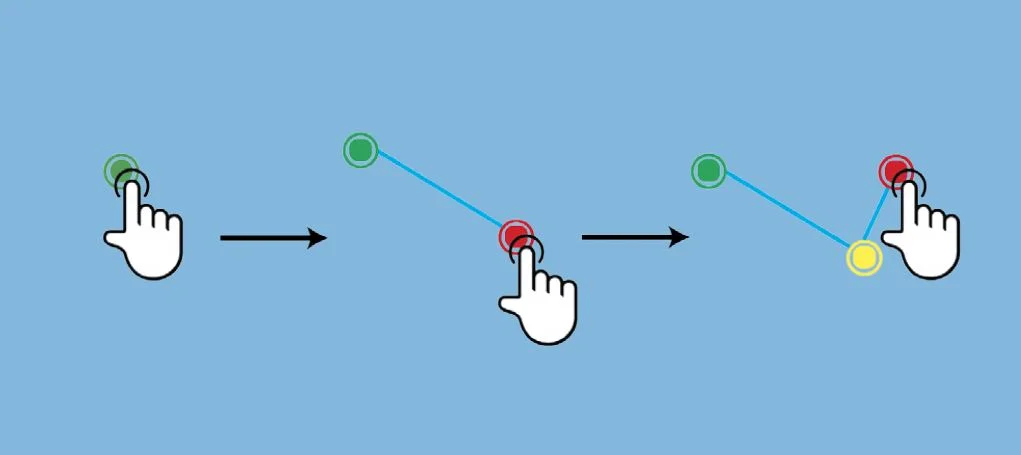
Colored nodes indicating the intended path of travel
The user maps the desired movements of the timelapse by tapping on the resulting image. The points are placed in order and the direction of travel is indicated by the color of the nodes (green indicates the first node and red indicates the last node). These nodes are joined by an edge to indicate the path that is to be traveled.

Setting menu when node is selected
Selecting an existing node allows the user to specify how long the time lapse will remain in a particular location. Additionally, this screen allows the user to fine-tune the scene by moving the frame with the use of the arrows around the image.
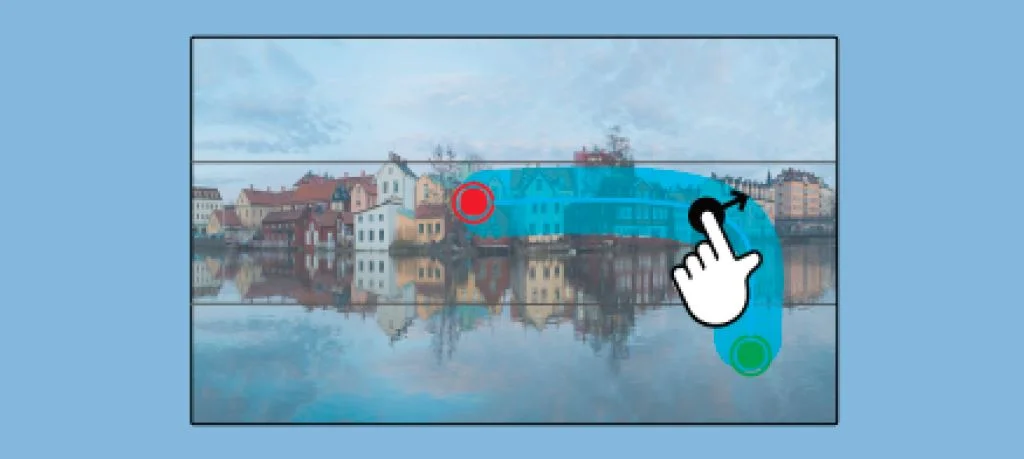
Dragging a path's route into the desired position
Once a path exists, it can be dragged to set an alternative course between two nodes. While adjustments are being made, the path enlarges to show what is in-frame during the camera’s movement.
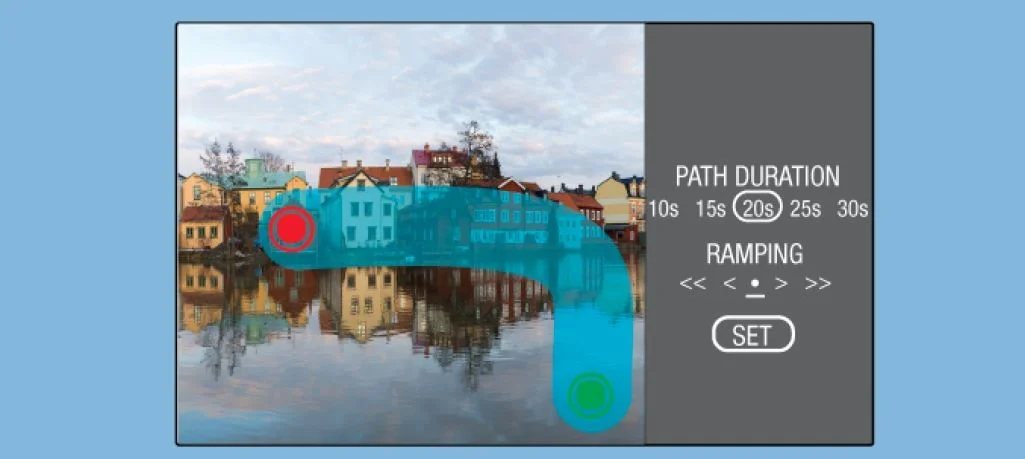
Setting menu displayed to set the path duration and ramping speed when the path between two nodes is selected.
Alternatively, tapping on a path allows the user to specify parameters related to the speed of movement. The user may specify how long it will take to travel between the two nodes as well as the relative speed of travel during the process.
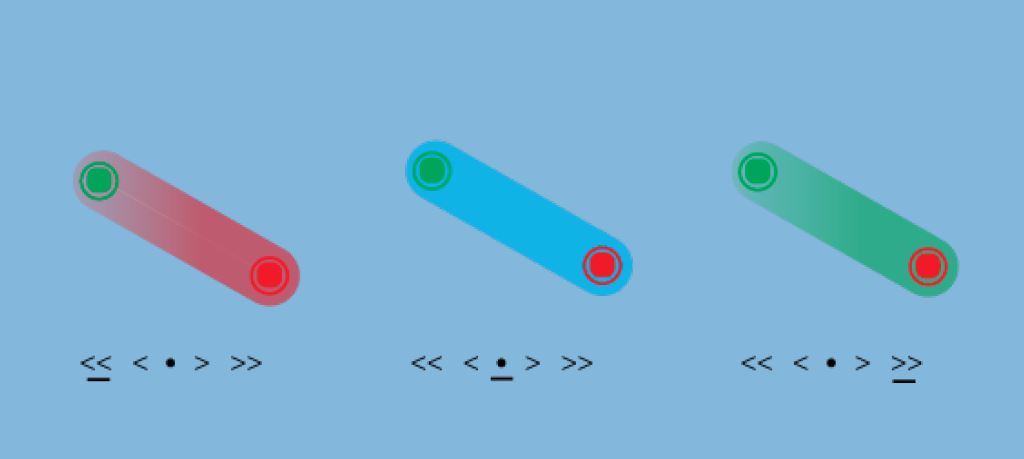
Color overlays used to depict a path's speed of movement.
Changing the ramping speed along a path is reflected by the color of the line. Red is used to depict a moderate or extreme deceleration along the path, blue is used to indicate a steady progression, and green is used to show acceleration.
When the user has finished configuring the desired movements, and the Osmo has completed capturing the timelapse, the result will be a sophisticated timelapse with extremely controlled motion. This motion will create captivating videos featuring beautiful reveals similar to those shown in the following video: